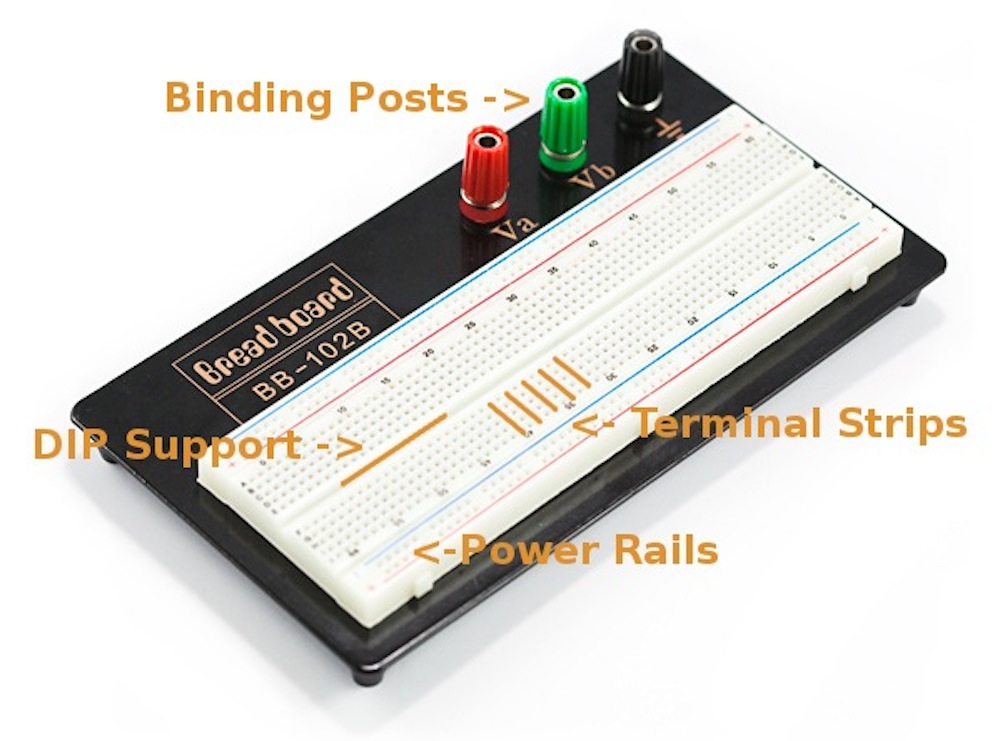
Anatomy:
Power Rails- Give you access to power wherever you need it in your circuit. Labeled either "+" or "-" and have red, black, and blue stripes indicating positive and negative sides. Power rails are not connected and if you want the same power on both sides, you need to connect the rails with jumper wires.
Terminal Strips- Clips allowing for wires or the legs of the components into the exposed holes. Once connected the component will be electrically connected to everything placed in that row. This electrical connection is because the metal rows are conductive allowing current to flow from any point in the strip. Five clips per strip is typical; it means that you can connect up to five components in one section of the breadboard.
DIP Support: The ravine separating the two sides of the breadboard is very important to DIP (Dual in-line Package integrated circuit). The DIP support is useful because each side of a DIP is unique and cannot be connected to each other.
Binding Posts: Allows different kinds of power sources to the breadboard. These posts are not actually connected to the breadboard; need to connect them using jumper wires.

No comments:
Post a Comment